View Cart
Freeland Photography Logo
  • HOME
  • EXPERIENCE
    • MEET CARRIE
    • THE FREELAND EXPERIENCE
    • SESSIONS & INVESTMENT
    • THE STUDIO
  • PORTRAITS
  • BUSINESS
  • CONTACT
  • BLOG
  • STORE
    • Vintage Portraits
    • Art Images for Sale
    • Guides
MENU

WoodPhotos- How to transfer your photo to wood. Photography Tips, Jackson, MI

04/22/2014 | By: Freeland Photography

Share


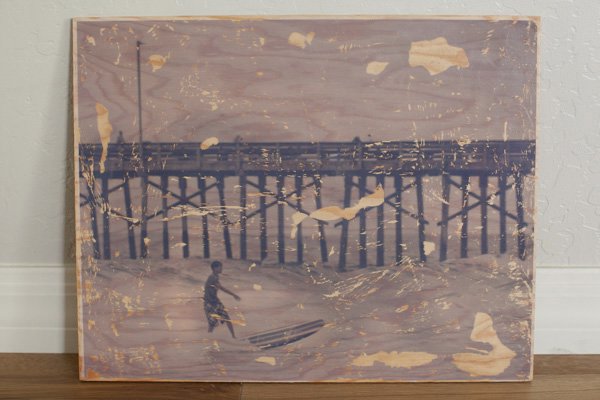
Transferring your photo to wood is a great craft for those that love the natural look of wood grain.  Here are some simple steps to tackling this craft.


1.  Get a piece of wood the size of your image from the hardware store.


2.  Print your image onto paper.  Black and white is best, but color will also work.


3.  Paint the wood with a Gloss Medium found at your craft store (Liquitex makes a good one).


4.  Place the image face down on the wood and press out any bubbles.  Print will be reversed when complete.


5.  Leave the picture alone to dry for at least 8 hours.


6.  Using a wet rag, dampen the paper and start rubbing the paper off.  You will see the image has transferred to the wood!

Leave a comment

Leave this field empty
This site is protected by reCAPTCHA and the Google Privacy Policy and Terms of Service apply.
Submit

0 Comments

Previous Post Next Post

Archive

Go

NAVIGATE

home about blog

CONTACT ME

CALL ME LOCATION EMAIL ME
Copyright Freeland Photography and Creative Studios 2024
Crafted by PhotoBiz
Freeland Photography Logo
CLOSE
  • HOME
  • EXPERIENCE
    • MEET CARRIE
    • THE FREELAND EXPERIENCE
    • SESSIONS & INVESTMENT
    • THE STUDIO
  • PORTRAITS
  • BUSINESS
  • CONTACT
  • BLOG
  • STORE
    • Vintage Portraits
    • Art Images for Sale
    • Guides
View Cart